Have you been scrolling Pinterest for craft ideas but don’t know where to start with your new Cricut machine? Don’t worry – this guide covers all the must-know facts, from the basics to detailed steps that will help you become a confident crafter.
Cricut Design Space App is Cricut’s official software that helps you create and manage your projects. To get started, download the app from design.cricut.com/setup and connect your Cricut Maker, Explore, or Joy using Bluetooth or a USB cable.
In this easy-to-follow guide, I will walk you through everything you need, from essential tools to step-by-step instructions to help you make the most of the Cricut Design Space Software.
Main Areas of Cricut Design Space Interface
Before we dive into the practical guide, let’s go over some basic yet important areas that every beginner should know in Cricut Design Space, with the help of the picture below.
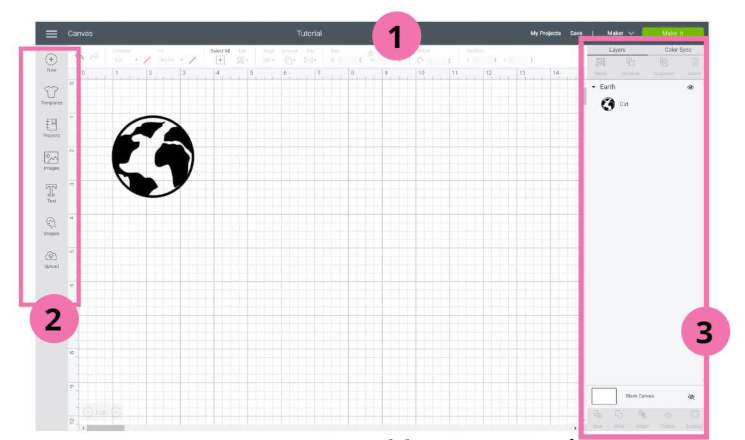
- Header Area: Includes the main menu, machine selection, project name, and the green “Make It” button.
- Design Panel: Located on the left, this panel lets you add shapes, images, text, and access features like Layers and Color Sync.
- The Layers toolbar: It gives you access to features such as Slice, Weld, Attach, Flatten, and Contour.
What Do You Need to Use Cricut Design Space?
Before getting started with Cricut Design Space, make sure to gather all the essentials you will need for a smooth crafting experience.
- Design Space software
- Cricut machine
- Cricut ID
- Cutting mat
- Blade
- Weeding tool
- Printable materials
- Device compatibility
- Internet connection
How to Use Cricut Design Space for the First Time
If you’re using “Cricut Design Space App” for the first time, this guide will help you get started before creating your first project. I have broken down the entire process in the simplest way possible for you.
Step 1: Set up Your Canvas
- Open Cricut Design Space and click on New Project.
- Adjust the canvas grid size and orientation as needed for your project.
Step 2: Pick Your Design Elements
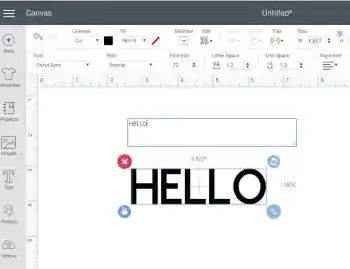
- Click the Text icon and type your desired text. Customize the font, size, style, and spacing.
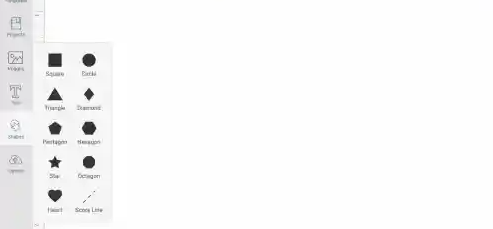
- After that, you can explore the Cricut library, upload your own images, or add basic shapes like circles, squares, and stars to your project.
- For shapes, navigate to the Shapes panel to add basic shapes, such as circles, squares, and triangles.
- You can upload various image formats like JPG, PNG, SVG, etc.
Step 3: Arrange Your Design
- Drag and drop your designed elements to arrange them on the canvas.
- Use the sizing handles or the size input box to adjust the dimensions of your elements.
- Use the color selector to change the color of your elements.
Step 4: Group, Attach, or Weld Items
Cricut Design Space utilizes layers, allowing you to organize your elements and adjust their stacking order.
- To keep multiple design elements together as a single unit for moving, resizing, or rotating, select the elements and click “Group” in the Layers panel.
- To maintain the relative position of design elements on the cutting mat. Select the elements you want to attach, then click Attach in the Layers panel.
- To permanently combine multiple design elements into a single, unified shape. Click Weld after selecting your desired elements.
Step 5: Select Material Settings
- Click Make It to proceed to the material selection screen. Go for any last-minute adjustments. After that, click Continue.

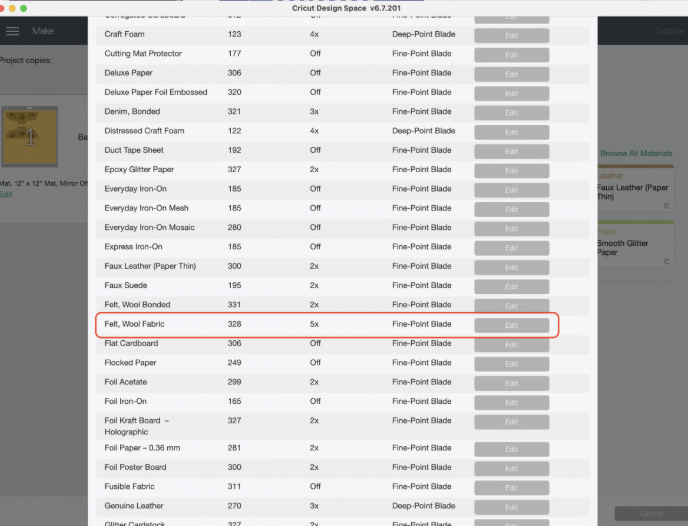
- On the next page, click Browse All Materials.
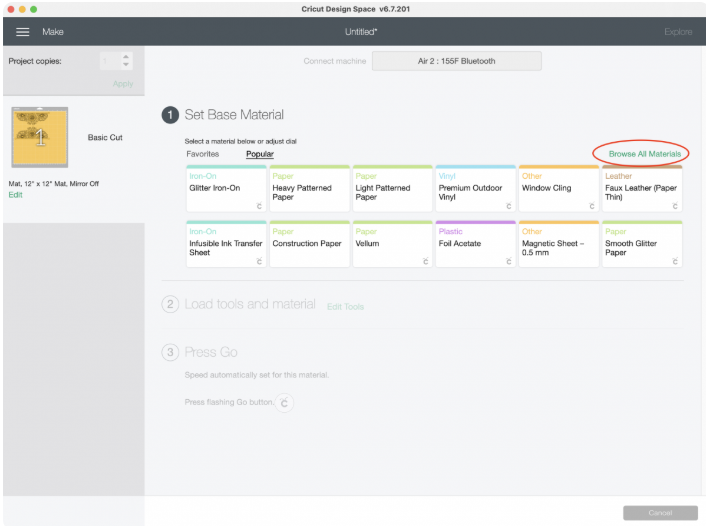
- Next, select the Material Settings.
- Choose the appropriate material setting based on your material type and the desired cut. Use preset custom materials if needed.
Step 6: Load Material and Cut
- Cricut Design Space will prompt you to load the required tools or blade before starting the cut.
- Align the cutting mat with the guides on the machine.
- Ensure your material is properly aligned on the mat, and then press the Go button to begin the cutting process.
Step 7: Weed and Finish Your Project
- Once the cutting is complete, unload the mat from the machine.
- Now, carefully remove the cut design from the mat.
- Weed away any excess materials from the design using the weeding tool.
- Assemble your project as needed.
Frequently Asked Questions (FAQs)
How Can I Import a Design into Cricut Design Space?
Learn how to import design into Cricut Design Space App, Follow These Steps:
- Open Cricut Design Space and start a New Project.
- Then, click the Upload button on the left-hand side of the canvas.
- After clicking on it, your computer’s file browser will open, allowing you to select your design.
- You can either browse for it or drag and drop the file into the canvas area.
- Cricut Design Space will ask if you want to upload it as a cut image or a pattern fill. Proceed with your desired option. Click Insert Images.
What Is the Best Image type for Cricut?
For Cricut projects, SVG (Scalable Vector Graphic) files are the best choice. It can be scaled up or down without becoming blurry or pixelated, ensuring clean cuts at any size. It contains multiple layers, which is helpful for complex designs with different colors or materials.
They are relatively small in size, making them easy to upload and work with in Cricut Design Space. Cricut machines rely on vector paths to cut designs, and SVG files are particularly designed for this purpose.
How do I Calibrate My Cricut Maker?
Learn How to Calibrate your Machine, follow the instructions given below:
- Open the Cricut Design Space software on your computer.
- After that, go to the Menu (three lines in the upper left corner).
- Click on Settings and navigate to the Machines tab.
- Then, go to Cricut Machine Calibration and choose Cricut Maker from the list of connected machines.
- Now, click the Start button to start the Cricut Calibration Process.
- Next, choose your desired calibration.
Why Is My Cricut Maker Not Cutting Properly?
If your cutting machine is not cutting properly, try the following steps:
- Check for debris or obstructions in the blade housing or around the cutting area.
- Use a small brush or compressed air to remove any debris from the blade clamp.
- Remove the blade housing, depress the plunger, and then carefully insert the ball of aluminium foil multiple times to remove debris.
- Ensure the Cricut cutting mat is sticky enough to hold the material firmly in place.
- Reset the machine’s firmware through Cricut Design Space.