Before we learn how to Print and Cut on Cricut, we need to dive into Cricut Design Space to learn about this useful feature. You can use this feature with your Cricut Explore Air 2, Maker, Explore 3, and Maker 3, but not with Cricut Joy, as it does not have the ability to Print and Cut.

Have you done any projects with this feature yet? If not, don’t worry; let’s learn with this ultimate guide, which can help you with the complete process of printing and cutting on Cricut.
Note: The Explore Air can only cut white material, while the Maker can cut white and medium-colored papers, making the latter more versatile for various projects.
What Is Cricut Print and Cut?
Let’s learn what Cricut Print and Cut is! Print Then Cut is a feature in Design Space that allows users to print designs from their home printer and then use their Cricut machine to cut them out precisely. The machine’s scanner reads the printed design and cuts along the printed edges, resulting in a perfectly cut image.
This feature eliminates the need for manual cutting with scissors and is useful for creating stickers, card toppers, and other printed designs.
Things to Consider While Using the Print and Cut Feature
When using the Print Then Cut feature, be aware of the following points:
- Inkjet printers are generally recommended for printing and cutting, as they are more compatible with the types of materials used.
- Using the highest print quality setting on your printer can help ensure crisp, clean prints.
- Adding a bleed (a small border around your design) can help with more precise cutting.
- Calibrate your machine for Print Then Cut before starting your project.
- Consider using a printer with good print quality, especially for intricate designs.
- Ensure the material is straight and wrinkle-free.
- Ensure your machine is not in direct sunlight or exposed to harsh lighting, which can interfere with the sensor.
- If the machine fails to read the sensor marks, check for smudges or debris on the mat and sensor light.
How to Print and Cut on Cricut: Simple Steps
This section covers everything you need to know about using the Print Then Cut feature. Let’s get started with the project!
You will require a Cricut Explore Air 2 or Maker machine, your home printer, a cutting mat, printable vinyl, Cricut tools-specifically, a weeder and spatula—and sticker paper or cardstock.
First, switch to the Beta version of Cricut Design Space to access the maximum allowable size for your image, which enables larger Print Then Cut designs.To do that, go to the hamburger menu at the top left and tap on Settings. Then, click on the Beta option beside Application Experience and click Done.
Note: If you want to print your Image larger than 6.75″ x 9.25″, you won’t be able to do it until you switch your Cricut Design Space Version to the beta version. You will receive a repetitive error message until you minimize the size.
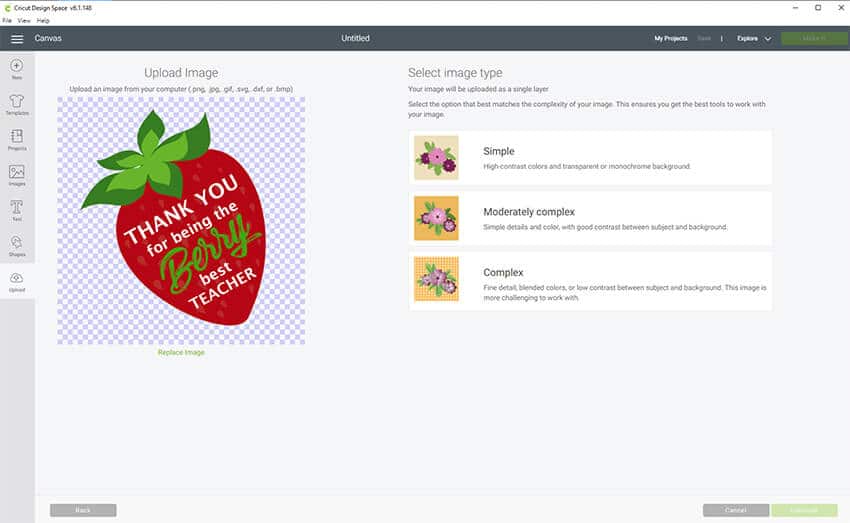
Step 1: Open Cricut Design Space and create a new project. Upload your desired Image by clicking Upload in the bottom left menu. After that, click Upload Image.

Step 2: If you’re uploading for the first time, upload a JPG or PNG image. You will be asked to select the Image type. Select Complex and click Continue.
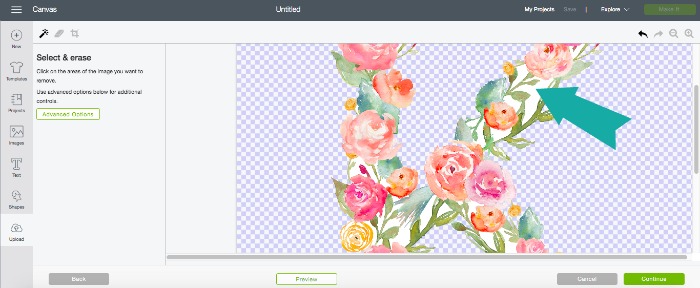
Step 3: Next, you have the chance to modify your Image either by cropping or erasing any part of the Image or the background.
To erase the background, select the eraser and click on the areas that you want to remove. Once you’re satisfied with your design, click on the Continue button.
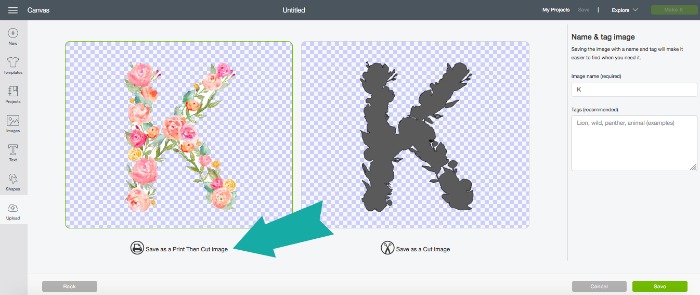
Step 4: Select SAVE AS PRINT, THEN CUT IMAGE, enter your tags, and click “Save.” Entering your tags will enable you to organize your projects, easily identify designs, and share your work with others. It will save you time when looking for something in particular.
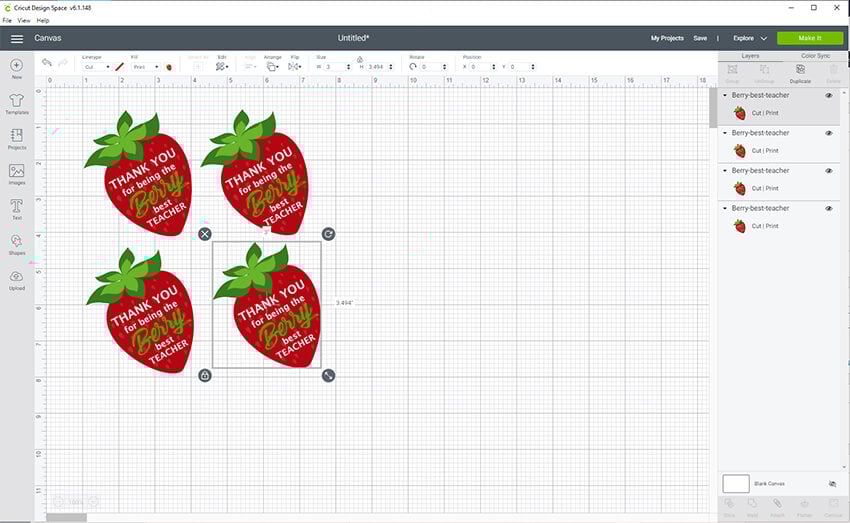
Step 5: After that, select your Image and click on “Insert Images”. If you desire to have more images on the same page, duplicate your item until your page is completely filled.
Step 6: If the image size is too big, click on the red info circle in the Layers menu at the top right corner. A new pop-up window will appear explaining why your Image is too large. You can click on Auto Resize Image or Change Page Size according to your preference to fit it to the paper size.
Note: You can only print on 8.5″ x 11″ paper/vinyl. But it’s possible your printer might support a print-and-cut image of 6.75″ x 9.25″. So make sure to choose within these dimensions and click Done.
Step 7: After selecting the page size, return to the warning sign and click Auto Resize Image.
Step 8: If no indicator is on, your file is ready to print and cut! Click on MAKE IT and then click Send to Printer.
Step 9: Choose your printer model and click Print.

Step 10: Once your design is printed successfully, add your cutting mat and load it into the machine. Choose your material.
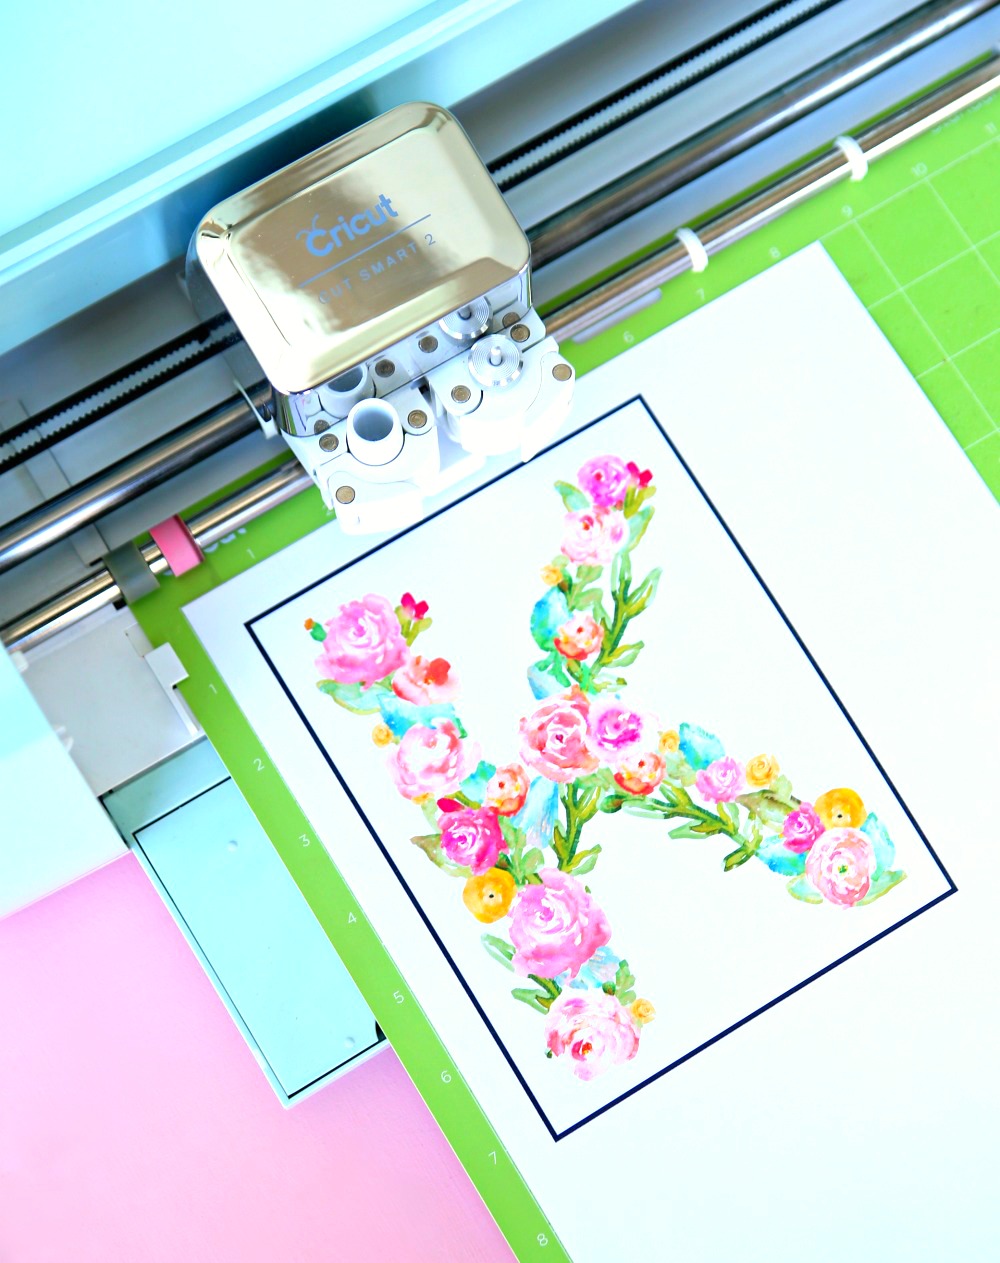
A black box will be printed around your design as a guide for the Cricut machine to recognize the cutting area.
And that’s it, you’re done here!
Congratulations! You’ve learned “How to Print and Cut on Cricut Machine“, unlocking endless creative possibilities for stickers, labels, cards, and custom designs.
Frequently Asked Questions (FAQs)
Why Is My Cricut Print and Cut Not Working?
Learn “how to Print Then Cut issues” often arise due to many reasons:
- Adjust the room’s lighting by moving the Cricut to a well-lit location or turning off bright lights to reduce glare. Experiment to find what works best.
- A misaligned machine can lead to incorrect cuts.
- Due to reflections, the sensor can struggle to read registration marks on glossy materials.
- Ensure the registration marks are fully filled in and dark enough for the sensor to detect them.
- Ensure your printed material is properly positioned on the mat, usually in the top left corner.
What Projects Can You Make With Print and Cut?
Print and Cut technology enables a wide range of creative projects, from custom apparel and accessories to personalized labels and stickers. Here are some of the project ideas listed below, which you can try:
- Custom T-shirts
- Tote bags
- Stickers and banners
- Custom labels
- Gift tags
- Temporary tattoos
- Cards and invitations
- Keychains
- Shadow boxes
- Mugs
- Wall art and many more decorative items
What Materials Can I Use to Print and Cut?
Cricut machines can use a variety of materials, including:
- White and lightly colored cardstock.
- Printable vinyl is a popular choice for making stickers, labels, and other decorative items.
- Full-page sticker paper allows you to create your own custom stickers.
- Printable Heat Transfer Vinyl is used to create designs on fabric, like t-shirts.
- Printable clear sticker paper, printable fabric, and many more.